

In this post, I’ll talk about what an adjustment layer is in Premiere Pro. I’ll also talk about why you want to use it. And run through a concrete example of how you might use an adjustment layer to efficiently manage multiple clips at the same time.
Table Of Contents
Why Use An Adjustment Layer In Premiere Pro?
An adjustment layer will apply effects to all clips/layers underneath it. This is great because this means you don’t have to manually modify each clip individually and have them all do the same thing.
And adjustment layer is also a great tool because it can affect all clips underneath it without modifying the clips’ inherent properties. This allows you to ‘undo’ the effect by simply deleting the adjustment layer, without having to manually undo the effect in each of the clips.
Demo Setup
I’ve setup a demo to show how you might use an adjustment layer.
In the spirit of Valentine’s Day coming up, I grabbed some heart icons from the internet. My objective it to animate them to go up and down, simultaneously. The setup looks like this:
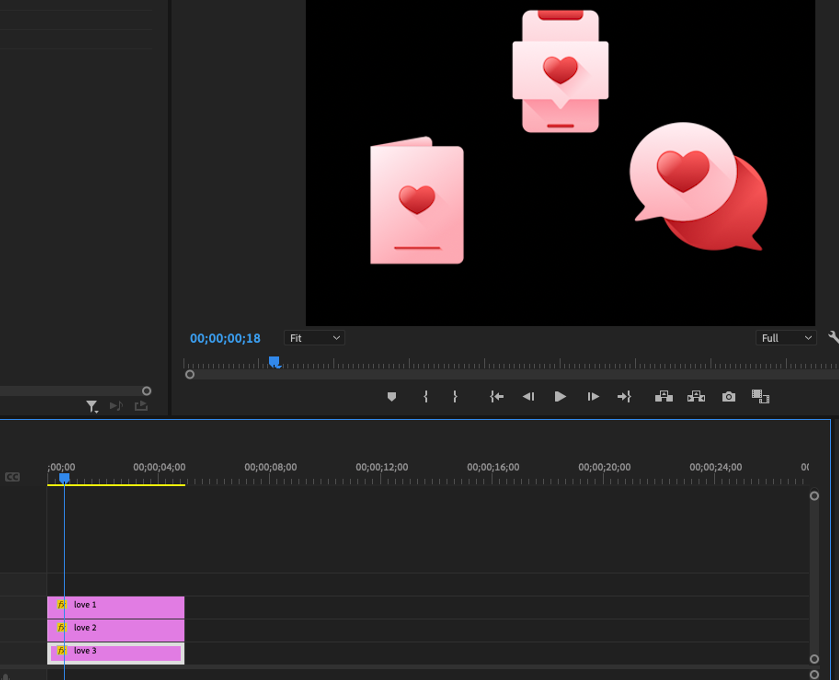
Note that there are 3 separate .pngs (and therefore 3 separate layers/clips).
Problem We Want To Solve
If you want to do this without an adjustment layer, you’ll need to:
- Pick the “love 1” layer above.
- Key frame it so it animates moving up and down.
- Pick the “love 2” layer above.
- Meticulously key frame it so it moves at the exact same frames and the exact same magnitudes as the “love 1” layer.
- Do the same for “love 3”.
Tedious, but not impossible.
Now suppose you have 50 layers you want to do this to. That’s very time consuming. This is where adjustment layers come in. An adjustment layer can affect all the layers underneath it. So in this example, if you’ve an adjustment layer, you can just do the keyframing once and all the layers below will be affected.
6 Simple Steps To Use An Adjustment Layer
First and foremost, Premiere Pro greyscales for some reason when you try to add an adjustment layer from the main menu:
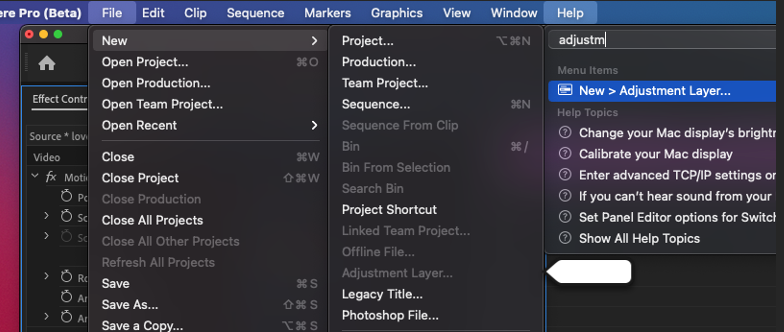
I have no idea why. So I’ll show you how do I normally do it.
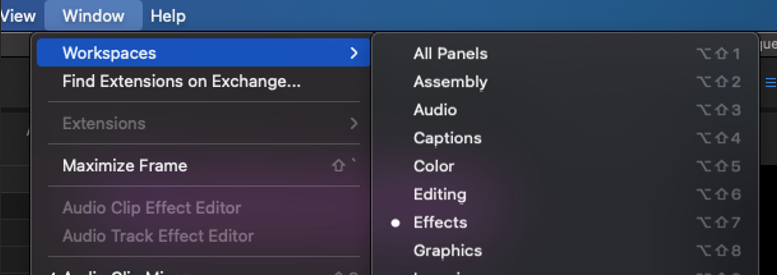
Before we begin, quick note: I only work in ‘effects’ workspaces mode – so make sure that’s the view you’re looking at, otherwise it won’t work. Though this mode should be default on a Mac, so you should be OK regardless.
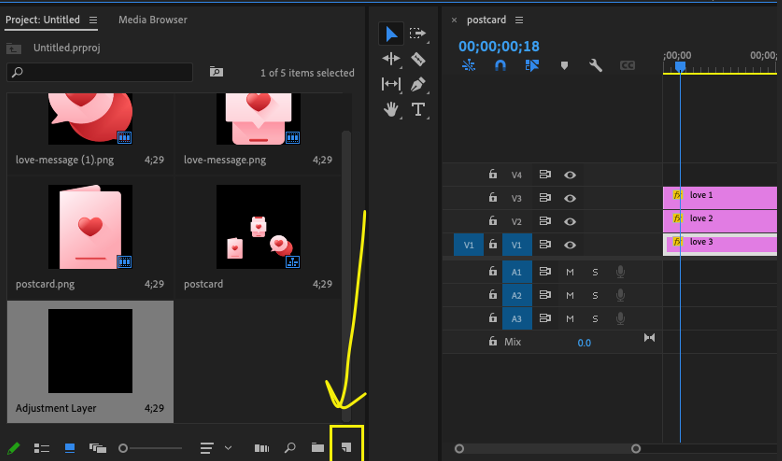
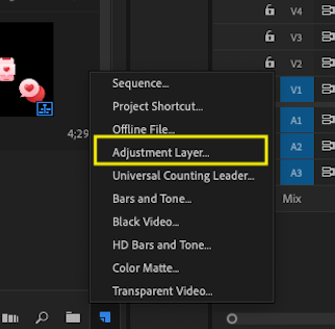
Step 1: First, go to the bottom left and click on the “New item” icon (yellow rectangle). It’s small, so I drew an arrow pointing to it:
Step 2: Then, press the ‘adjustment layer’ on the menu:
Step 3: Press OK on the dialog box. I can’t imagine a situation where you’d want the size/shape of the adjustment layer to be a different size than your viewport. But if you do – go ahead and change the dimensions before pressing OK.
Step 4: Drag & drop the new adjustment layer onto your timeline from your project assets (bottom left in the clip below). Unintuitively, generating a new ‘layer’ doesn’t drop it on your timeline. It just drops it into your project assets. Quick clip below to show you where to drag/drop it. I also change the color of the adjustment layer so it’s more organized (optional, but recommended for good habit practice).
Step 5: On the right hand side, in the effects pane, search ‘transform’. Drag/drop it to your effects control panel. NOTE: Keyframe + positioning directly on the effects control won’t work. The reason for this is because you’d be moving the adjustment layer itself. As opposed to telling the adjustment layer to affect the layers underneath it. Clip below:
Step 6: Finally, Keyframe the position by pressing on the clock icon and adjusting it however you’d like. Click on the click if you’d like to learn more about how to animate stuff, but the gist of it is just: 1) clicking on the clock icon tells Premiere Pro to start recording the position, 2) adjusting the timeline and the position tells Premiere Pro to extrapolate the positions in the frames in between your key frames. 30-second clip below:
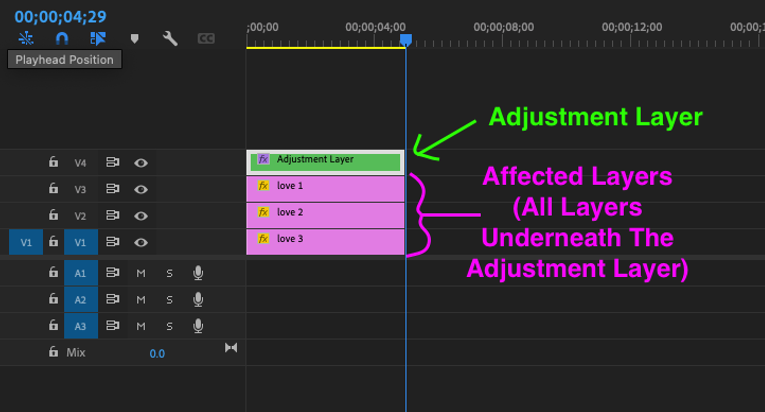
Note how just altering the “Adjustment Layer”’s transform property affects all the layers underneath it (namely layers love1, love2, love3).
And that’s it – you’re done! And again, if the concept of keyframing isn’t clear, you should definitely check out the other post above on keyframing.
Caveat
A quick caveat here is that adjustment layers in Premiere Pro affect all layers / clips underneath it. What happens if you only want to affect a subset of the underneath clips only? You can do this with nested sequences. Find out how you can use nested sequence in this post here where I talk about how you can have your Premiere Pro adjustment layer affect one layer only (or a subset of layers).
The Adjustment Layer In Premiere Pro: Quick Recap
To recap: the adjustment layer in Premiere Pro is a ‘helper layer’ whereby you can affect all of the layers underneath it, without having to adjust each layer individually. This is great because it’ll save tons of time in your workflow. But also it’s great because if you decide you don’t want to use that particular effect later on – you can just delete the adjustment layer instead of having to undo all your changes on all the layers that had the effect manually.
Including an adjustment layer is semi-annoying in Premiere Pro, as the thing is greyed out on the main menu. No idea why. But you can include it in your assets panel as I’ve shown above.
After you’ve included your adjustment layer in Premiere Pro, you just:
- Drop/drop it into your timeline.
- Move the adjustment layer above the layers you want to affect. A clip Vx is ‘above’ Vy if the x > y. For example: V4 is the adjustment layer above and “4” is bigger than “3,2,1” and so the adjustment layer above will affect V1, V2, and V3. But if you had another layer above at V5, the adjustment layer won’t affect it.
- Search for ‘transform’ (or whatever effect you desire) in the effects panel. Drag & drop it to your adjustment layer.
- Tweak, modify, and keyframe the adjustment layer to your heart’s desire.
- Double check that your adjustment layer has affected all the layers underneath it the way you want it to.
And that’s it, you’re done! Video editing is a crucial skill for all businesses, and I personally use adjustment layers extensively for my e-commerce business so I can edit videos swiftly. What business do you use your Adobe skills for? Comment down below and let me know!


0 Comments
Trackbacks/Pingbacks