

In this post, I’ll show you how to move text in Adobe’s Premiere Pro. In particular, I’ll show you how to move text over time using a very important concept called keyframes.
You’ll learn:
- A step-by-step example on how to move/animate your text in Premiere Pro so it moves/changes over time by using “keyframes.”
- How to leverage this keyframes concept in Premiere Pro to morph/move/animate literally everything else in Premiere Pro.
Table Of Contents
How To Move Text In Premiere Pro
Step 1: Have text on your preview window.
Step 2: Go to the Effects Controls pane and expand the relevant’s text dropdown.
- If you don’t know how to put text on the screen, or not sure where to find the Effects Control pane, I highly recommend reading this Premiere Pro Layout Tutorial. It’ll make all subsequent Premiere Pro tutorials you read much easier to follow.
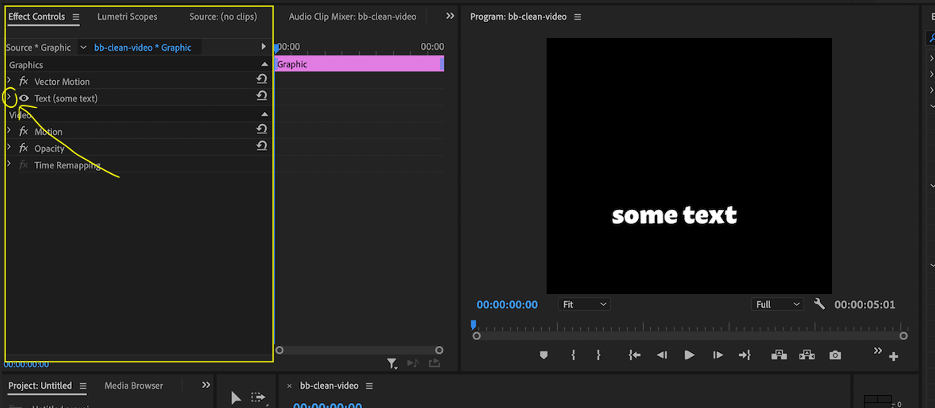
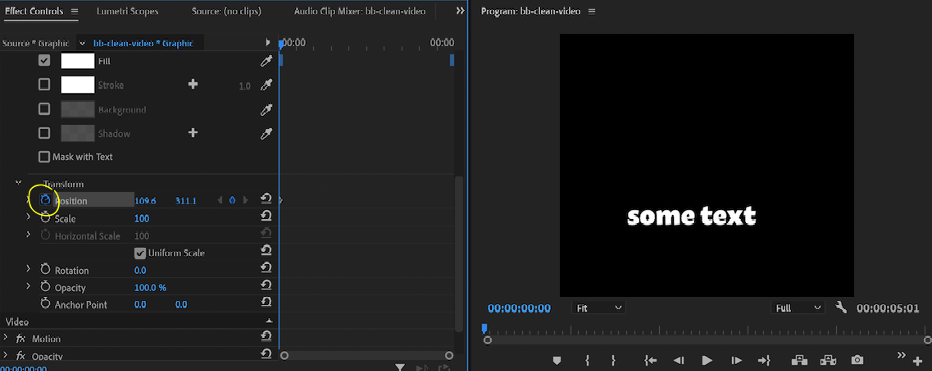
Step 3: Scroll down on the text’s dropdown to find the Transform dropdown. Click on the stopwatch button next to Position.
- This stopwatch button introduces the concept of keyframes in Premiere Pro. As soon as you click the stopwatch button, Premiere Pro will recognize that this element will change over time. To “undo” or revert keyframes for a particular element, just click on the stopwatch again so that it’s no longer blue.
- As soon as you click the stopwatch button, it’ll tell Premiere Pro that this is the exact position you want the text to be, at this exact time (as pointed to by your time cursor in the timeline). In my example below, I’m telling Premiere Pro I want the text to be at position 109.6 and 311.1 at time 0.
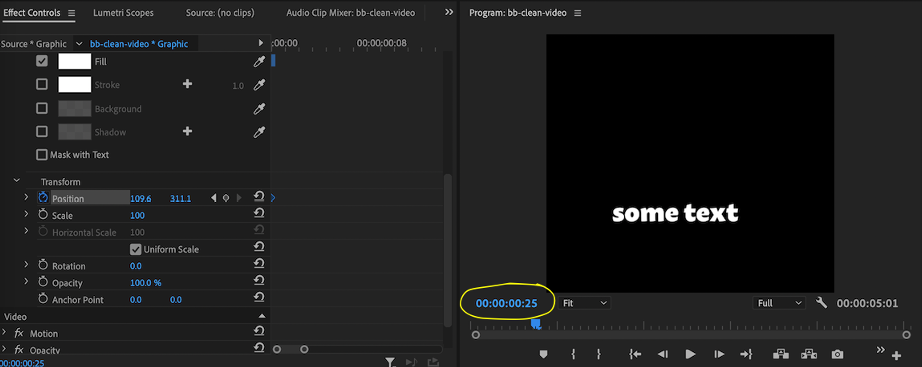
Step 4: Press the right arrow key to move forward in time by one frame. Or press shift + right arrow to move forward in time by 5 frames. In my example below, I did shift + right arrow 5 times to get to 25 frames into the movie.
- Likewise, left arrow moves the time cursor back in time by one frame, and shift + left arrow moves the cursor back in time by 5 frames.
- Because you can navigate time in your movie in a frame-by-frame granularity, you have complete control over how things are animated in Premiere Pro.
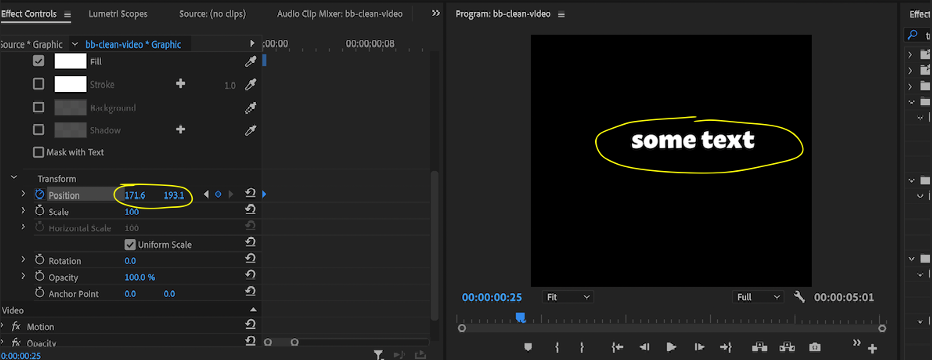
Step 5: Then, go ahead and change the position however you’d like. In the example below, I’ve changed the position to be more to the top-right at 171.6, 193.1. This tells Premiere Pro to extrapolate the position so that at time 0, the text will be at 109.6, 311.1 and move the text in such a way so that at frame 25, it’ll end up at 171.6, 193.1.
- This extrapolation is one of the most powerful things in keyframing. Premiere Pro will automatically move the text based on these positional timestamp checkpoints you assign it. Thus, you don’t have to animate every single frame yourself.
- To see it in action, I’ve included both a photo and a video below as an example. You’ll notice I only have put 2 checkpoints: (109.6, 311.1) and (171.6, 193.1) at 2 timestamps. Yet, Premiere Pro knows how to move the text appropriate in frames 1 through 24.
- The photo just shows the settings I did at frame 25.
- The video shows what happens if I were to play the movie after steps 1-5 is completed.
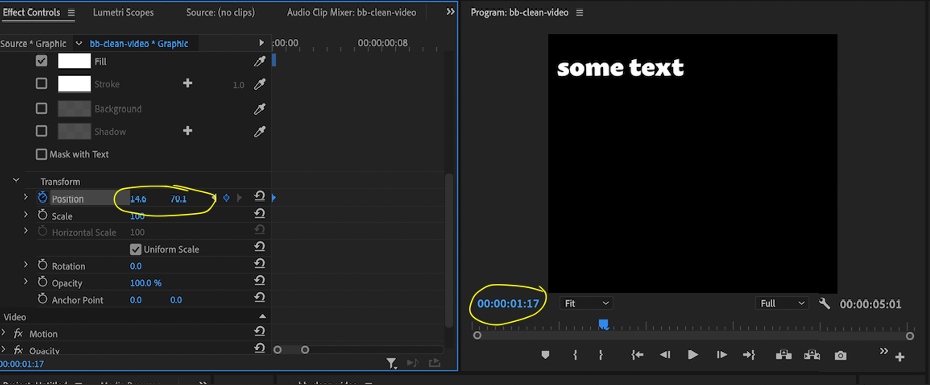
Step 6: Repeat step 4 by going forward in time some more. I’ve moved another 25 frames ahead in time for my example to 01:17.
Step 7: Change the position again. In my case, I moved it towards the top-left corner of the screen at 14.6, 70.1.
- This gives Premiere Pro a total of 3 checkpoints. At time 0, it should be at (109.6,311.1), at frame 25, it should be at (171.6, 193.1), and at frame 50, it’ll be at (14.6, 70.1).
- The first picture below is the settings I did for steps 6-7.
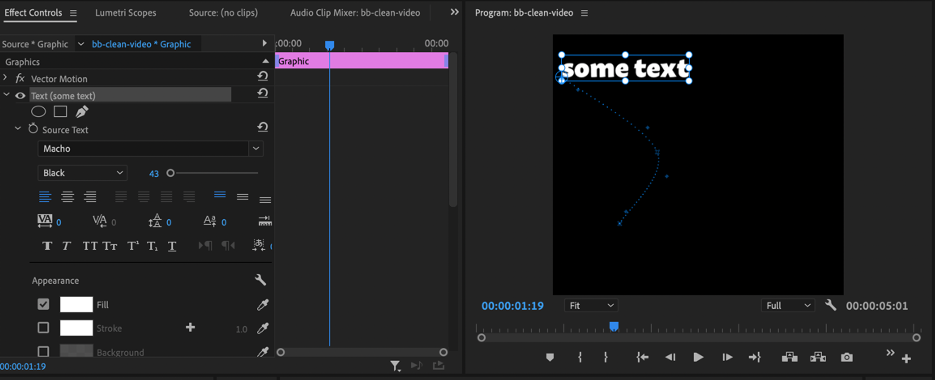
- The second picture is if you press v and select the text: Premiere Pro will show you the path that the text will travel over time.
- The video below is a demonstration of how Premiere Pro will animate these 3 keyframe checkpoints.
And that’s it! You can do this ad infinitum. And you can even go back and add more checkpoints. (As an example, in the above: you can go back to frame 30 and adjust the position to get finer-granularity animation).
But let’s explore this keyframes concept further. You can move text in Premiere Pro with keyframes. But it turns out this concept applies to everything in Premiere Pro.
How To Move Anything In Premiere Pro
You basically follow the same process for the moving text demo above.
You’ll notice pretty much everything has a stopwatch next to it in Premiere Pro:
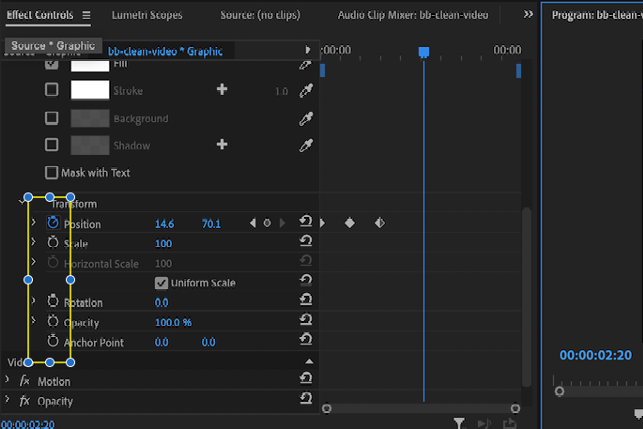
You can adjust the position, scale, rotation, and even opacity for the text alone with keyframes. You can even change the font of the text over time (not shown in screenshot above)! You just create “checkpoints” for each of these individual properties for the text and they can evolve be changed over time.
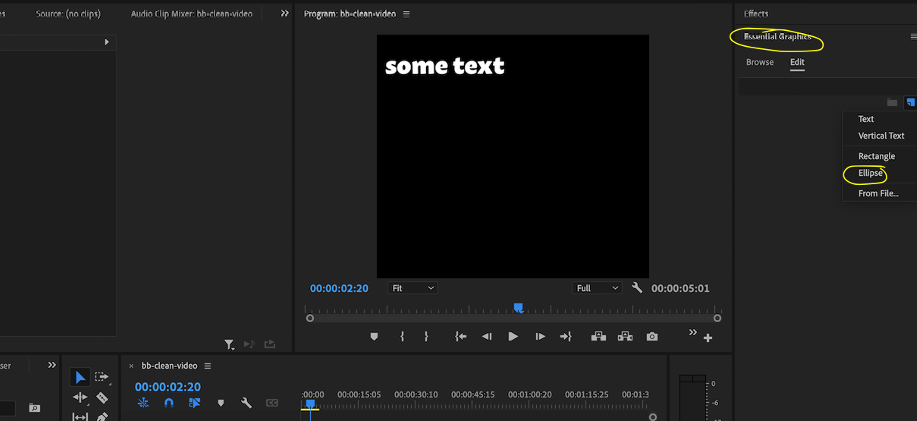
Let’s do something more interesting. I’ll press v and select away from my text and go to Essential Graphics. Then, I’ll click the new button to insert a shape. Say an ellipse.
I then go to its dropdown menu and I see I can change almost everything about it over time.
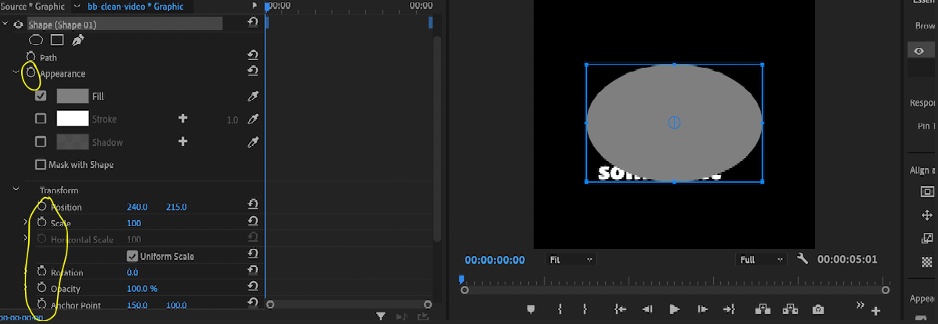
As an example below, I’ve made the grey elliptical red 25 frames into the movie. I just followed steps 1-5 above, except I changed the “fill” instead of the position on step 5.

To further show how easy this is, I’ve gone ahead and added keyframes for position, scale, rotation, and opacity for the ellipse. See video below for how this plays out. Also notice that all of the position, scale, rotation, opacity has their stopwatches set to “blue,” meaning they are being keyframed.
In Conclusion
Almost everything in Premiere Pro can be changed dynamically over time with keyframes.
This, along with the fact that you can navigate a movie frame-by-frame means you have 100% control over how every single element in Premiere Pro can be transformed in a frame-by-frame granularity.
Being able to move things around dynamically can liven up the movie you’re trying to make. Certainly, it’s quite a bit more exciting than a stale movie where nothing’s moving.
Likewise, you can insert shapes to accompany panning shots.
- For example, you insert an arrow shape and have it point to a box in a room.
- The box moves around in the frame because you’re panning across the room.
- With keyframes, you can have the arrow follow the movement of the camera so it keeps pointing to the box, even though the box is moving in the frame!
Of course, the above is just a tiny handful of examples. The possibilities are endless with keyframes! You came here to learn how to move text in Premiere Pro, but instead you now know how to animate literally everything in Premiere Pro!


0 Comments