

In this video editing tutorial, I’ll show you how to add text in Premiere Pro. I’ll also very quickly show you how to add boxes behind your text so your font always has a background to contrast against.
Knowing how to do this is a crucial skill, because:
- You might need to have closed-captioning for an audience that is hard of hearing.
- If you’re advertising: most Facebook and video ads are played on mute by default. Companies do this so people can scroll through social media during social events without being too obnoxious about it. Thus, your audience have to be able to read what you’re trying to convey, not just hear it.
Let’s get started.
Table Of Contents
How To Add Text In Premiere Pro
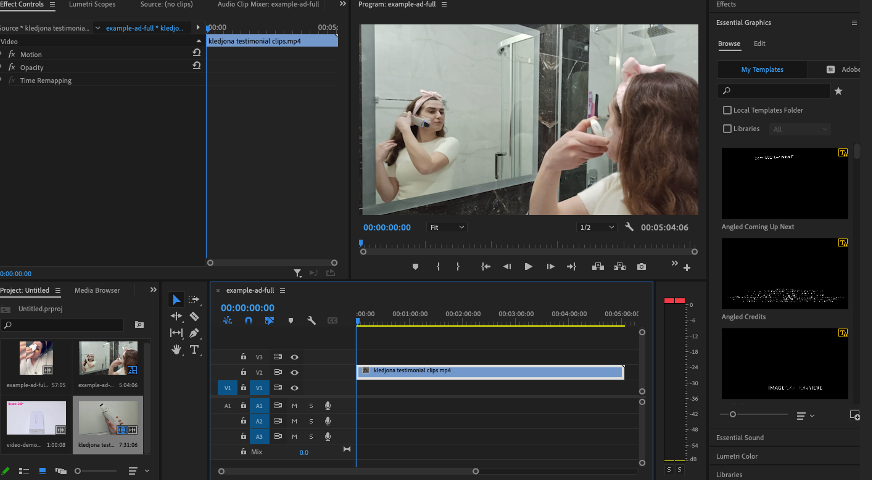
First step, you’ll need to load up a video click to your Premiere Pro program.
In my example, I’ve loaded up a video clip of a Fiverr contractor I hired to model a beauty product. It looks something like this:
Step 2: Then, just press “t” to load up the go into “text mode”. Point to the movie preview window and left-click to add your text. See the quick video clip below to see how I’ve added the text.
Step 3: After you’ve added your text, customize it! You can edit and customize the text however you’d like on the left-hand side window. In the below clip, I demonstrate how you might be able to change the font, sizing, and color of the text via the effects control window. For more details on my particular Premiere Pro layout and what the Effects Controls do, read my Premiere Pro walkthrough.
How To Make The Text Always Legible In Premiere Pro
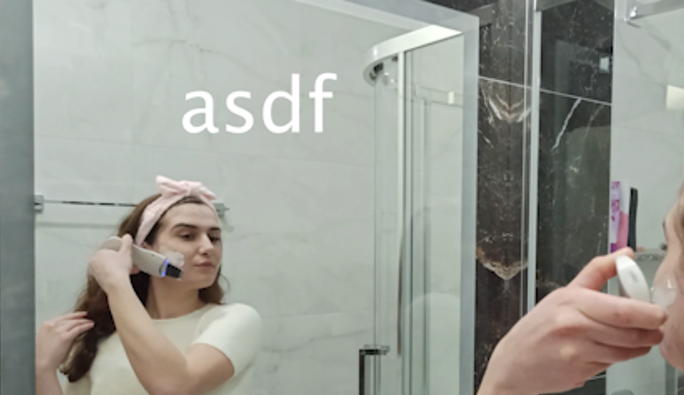
You might notice in the video clip that the background is fairly white. If you were to use white text, it’ll be fairly difficult to read. For example, “asdf” below doesn’t really pop.
A good trick to counteract this and to make your text “pop” regardless of what’s playing in the background is to add a rectangle behind the text. And the rectangle will be filled with a color that contrasts the text. This means that regardless of whatever movie’s playing in the background, you’ll be sure that the text is easily read.
So here are the steps to add a high-contrast rectangle.
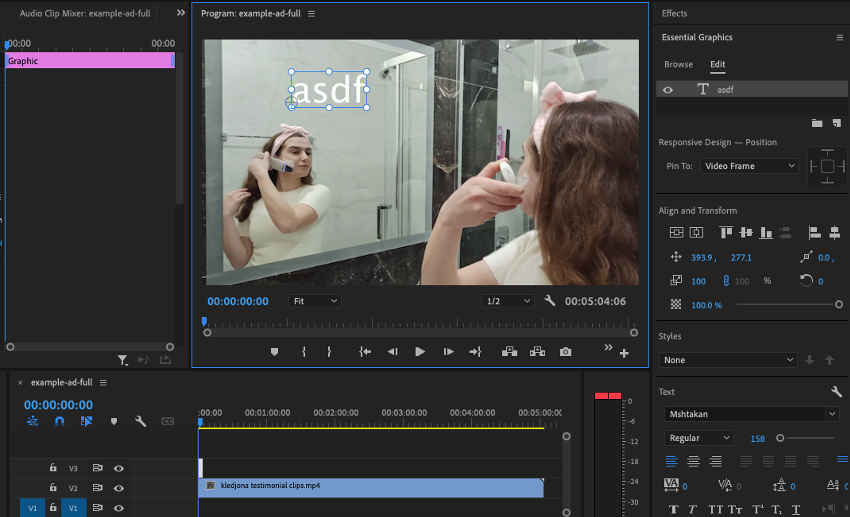
Step 1: First, press v and select the text. Once you’ve selected your text, it should have a rectangular outline around it like so:
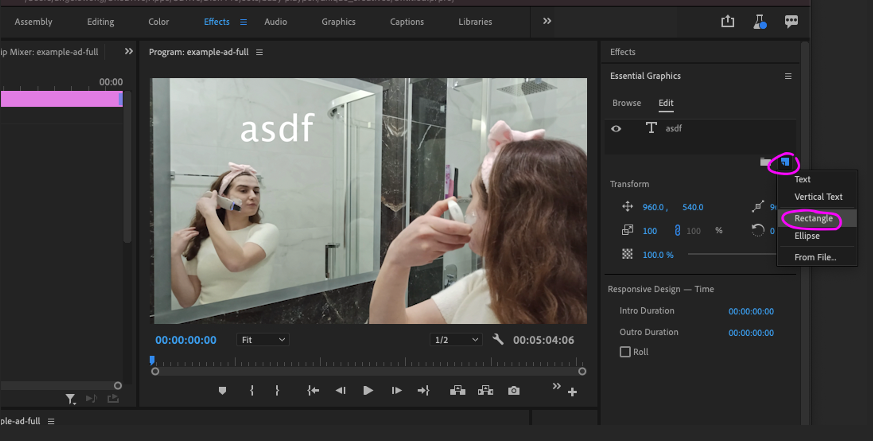
Step 2: Then, go to the essential graphics on the right-hand side and press the “New Layer” button. Press Rectangle.
Step 3: Next, drag/drop the new shape in the Essential Graphics pane so that it’s beneath your text. This’ll ensure that the rectangle shows up behind, and not in front, of your text. Here’s a 3 second clip below showing you how that’s done.
Step 4: Finally, you can resize/move the rectangle to be behind your text. Pick the color you’d like for the rectangle so that it contrasts with your text nicely. In my case, I had white font, so I picked black text to keep it simple.
And that’s it!
Wrapping It Up
In this quick Premiere Pro tutorial post, we how to:
- Add text on a video.
- Add a high-contrast rectangle behind your text, so that your closed-captioning will be legible regardless of what’s playing in the background.
P.S: If you’ve any suggestions/topics on Premiere Pro tutorials, please feel free to reach out at hello@goodmoneygoodlife.com and I’ll be sure to add it in my blog!


0 Comments