

In this post, I’ll show you how to move an image behind another in Photoshop, the easy way and without having to remove any backgrounds!
A lot of times, you might need to interleave / interlace objects if:
- You want to put a font/object partially behind another object.
- 2 objects have parts where one object is in front of another, and vice versa. For example, in the image below, you can imagine that the prison bars is one layer. And the person doing the pose is another layer. Parts of the person is in front of the prison bars, and parts of the prison bar is in front of the model.
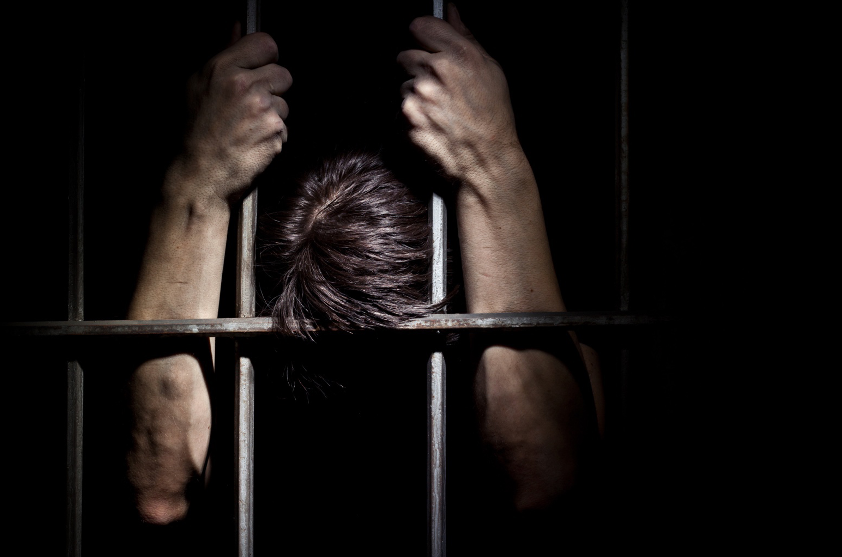
Table Of Contents
Example 1: How To Move An Image Behind Another In Photoshop
Because images are just layers. And font is also just layers. For the examples in this post, I’ll just be working with rasterized font so it’s 1) simple, and 2) it behaves like an image.
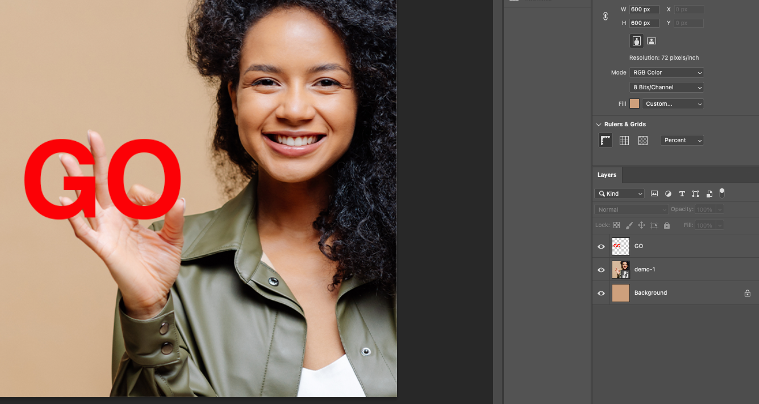
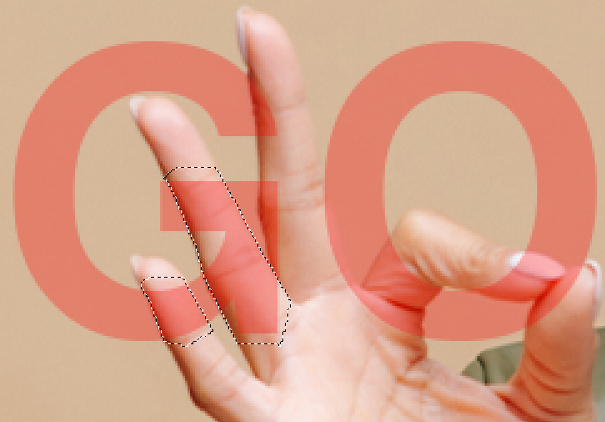
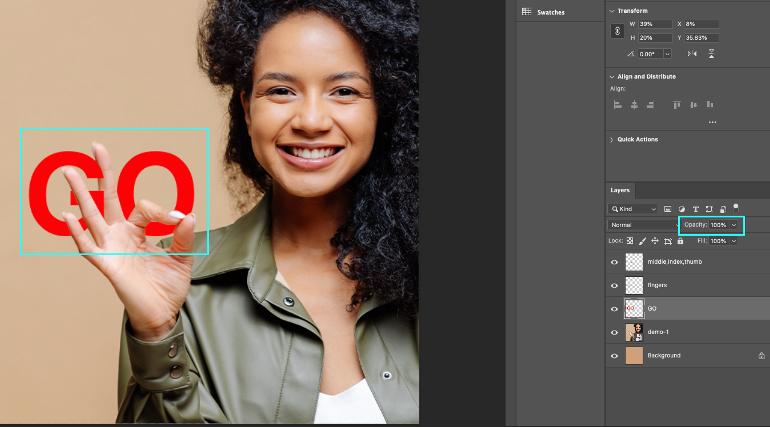
In this first example: I’ll just interleave the word “GO” between fingers. The “GO” will act as the prison bars in the previous example above. It’ll behave like an image (because it’s rasterized), and it’ll be interleaved with some parts above and some parts below a subject.
Ergo, by interleaving the font with the subject, you’ll learn in this example how to move an image behind another in Photoshop and interlace them.
Here’s what the image looks like before I did anything:
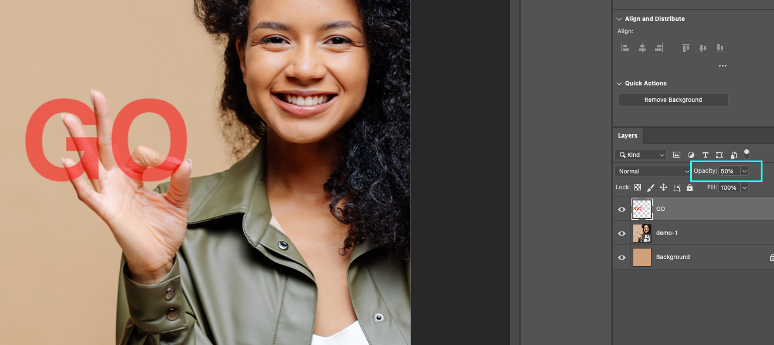
Step 1: First, you should take the thing you’re trying to interleave and give it 50% opacity. This’ll make the subsequent parts easier. I my case, I set my ‘GO’ to 50%.
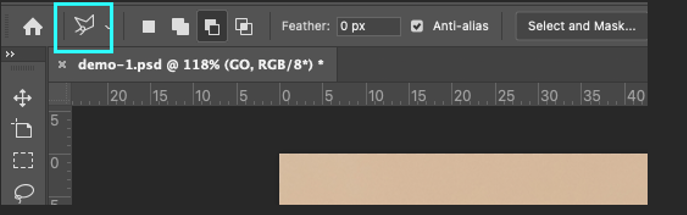
Step 2: Then, select the subject layer and start masking her fingers. I like using the trapezoidal lasso tool to do this (hotkey: lowercase L to invoke the lasso tool – then do shift + L to toggle between lasso tools until you end up with the lasso tool that looks like the below).
Step 2.5: We want some of the subject’s fingers (ring/pinky) to be above the word “GO”. Thus, we’ll just mask the overlapping parts of GO and the subject’s fingers, on the subject’s layer. The 50% opacity we did in step 1 makes this step easier, since we can see the overlapping parts between the subject and the word “GO”. Feel free to change the opacity to something lower even (like 30%) if you want more visibility on the subject layer. The mask should look like the below. When creating a new trapezoid, be sure to do shift+click to be able to create multiple masks in one fell swoop. Otherwise, upon starting a new trapezoidal mask, you’ll delete the other one you’ve made.
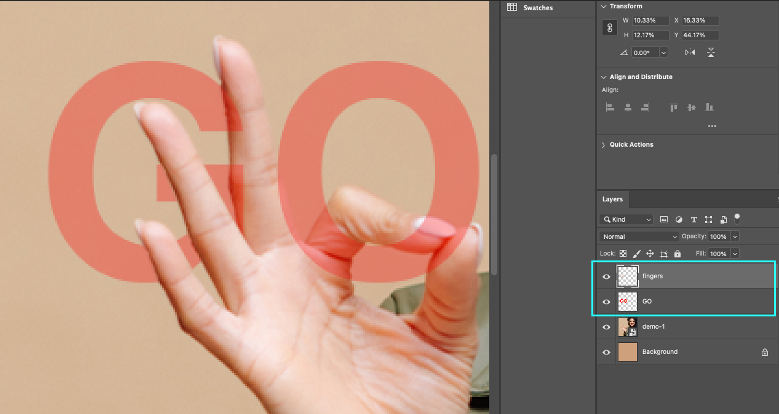
Step 3: Select your subject’s layer and duplicate the mask by doing cmd+J or ctrl+J (if on Windows). Then, move that layer above the ‘GO’ layer. In my example, the duplicated layer is renamed to ‘fingers’ and I drag/dropped it to be above the ‘GO’ layer (see below). Note that I’ve preserved the original demo-1 image throughout.
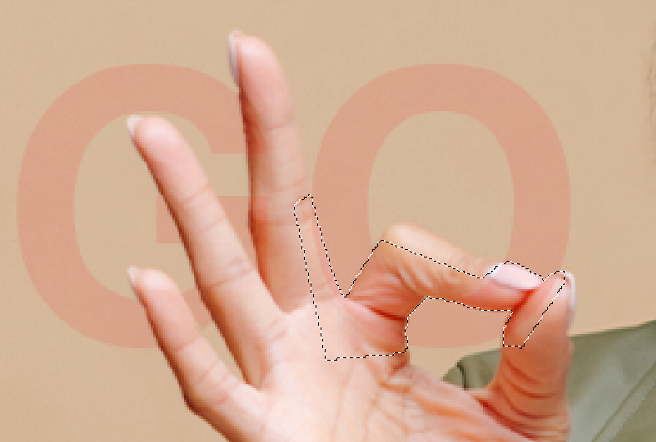
Step 4: Note that some parts of the letter ‘G’ is overlapping with the subject’s middle finger. Let’s have it stay above her middle finger. This gives an interleaving effect where part of the ‘GO’ image is behind the subject image, and part of it is in front. But let’s keep going and have the “O” behind the subject’s hand. I’ve changed the opacity to 10% for the image ‘GO’ so that it’s easier to mask. We’ll just repeat steps 2-2.5 above to get the following mask:
Step 5: Repeat the duplication step described in step 3. Then you’ll end up with something like this:
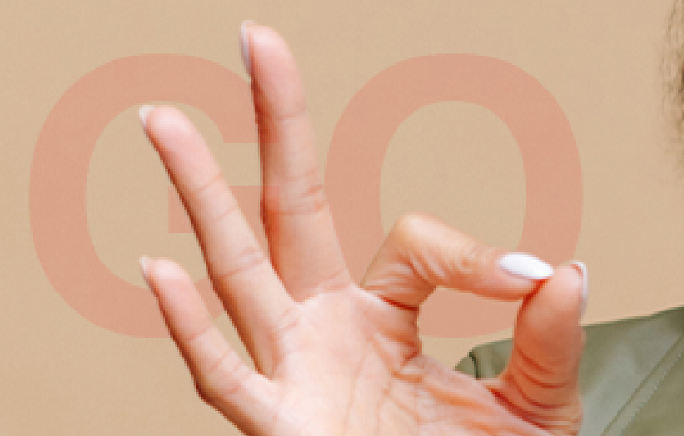
Step 6: Finally, go back to the ‘GO’ image (or the image you’re trying to interlace / interleave with a subject) and turn the opacity back to 100% to finish the image off (highlighted in teal rectangles for emphasis). Note how parts of the image ‘GO’ is in front of the subject image’s finger and some parts is behind – such is the power of Photoshop.
A Simpler, But Less Robust Way
You might notice in this example that the beige background could be easily removed. And once removed, you could just slip the ‘GO’ underneath the subject and you’re good. This is true and you can do that – but this technique is more robust. Suppose the subject had a complicated background (instead of the beige) that you’d like to keep. What then? It’s quite inconvenient and allows for the image to look very flaws if you:
- Remove complicated background from subject as one layer.
- Remove subject from complicated background as another layer.
- Slip the ‘GO’ between the subject/background layer.
Namely, steps 1-2 will give you some inaccuracies. In any Photoshop project if there’s a good way to preserve the original image, we should. This generally results in the highest quality work.
True, but beauty of this method is that it works even if the mask is hard to extract (i.e. the background is hard to extract from subject). This method’s also good because if you can easily mask the overlapping object(s) by hand, you can skip the annoying process of having to extract things from their respective backgrounds.
Another Example
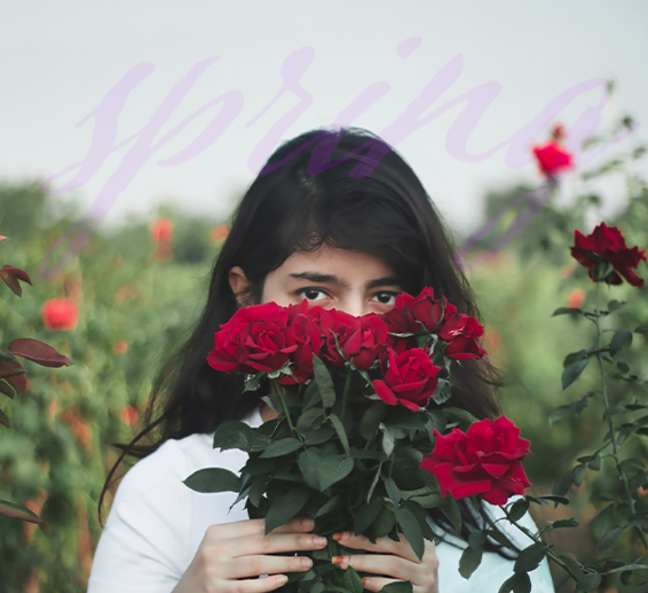
Let’s do another example. Here, I’ll have the font-image “spring” be underneath our subject.
This example illustrates the issue above. The background is complicated and the subject would be quite difficult to extract from the background. Thus, the procedure of 1) creating a layer with the subject, 2) making another layer with the garden background, and 3) slipping our font-image between the subject/background isn’t feasible here.
Here’s the raw of what we’ll start with:

Step 1: First, let’s turn the opacity of the font-image to 10%.
Step 2: Select the subject layer and mask the part of the subject you’d like to be in front of the font-image, using the trapezoidal lasso tool as above.
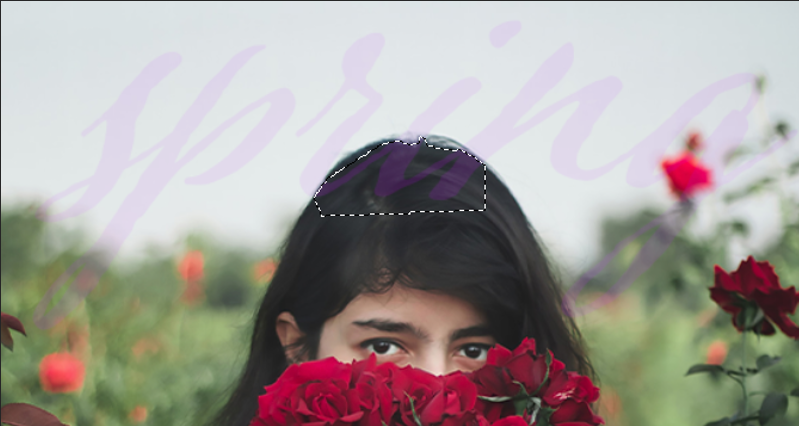
Step 3: Do cmd+J/ctrl+J to duplicate the mask to a new layer, and move that layer above the font-image. Layman’s terms: I duplicated part of her hair so I can cover up part of the “spring” font-image.
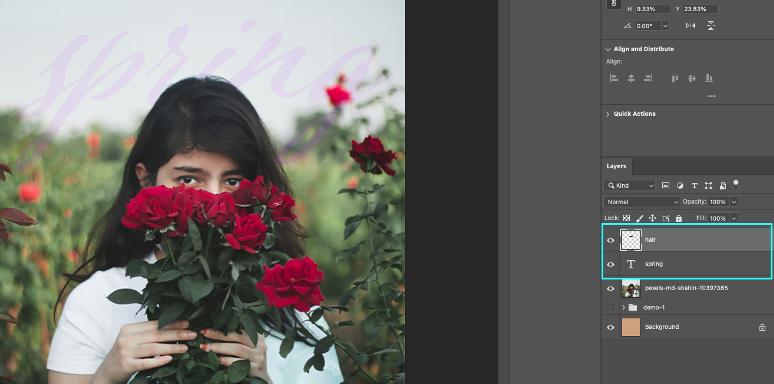
Step 4: Finally, restore the font-image’s original opacity.

Voila, you’ve successfully moved an image behind another in Photoshop, even if the subject image has a super-complicated background you can’t extract. And this can be done in a few minutes.
Comparison Of Ways To Move An Image Behind Another In Photoshop
One can move an image behind another in Photoshop by simply:
- Masking both images.
- Selecting the layer you want to move behind the other object.
- Moving that layer below the other object.
- Pressing v to select the object and moving it behind the object.
But the above, simple method doesn’t work a lot of times because of step 1. A lot of times, you don’t want to mask an image because you’d like to keep its background.
The alternative is to mask both the foreground and the background, and slip the image you’d like in between the 2 masked layers. This presents a problem because it’s 1) time-consuming, and 2) will corrupt your images.
A much easier, faster, and higher-quality way to move an image behind another in Photoshop (and even interlace/interleave them) is as follows:
- Set the opacity low for the layer you’d like to be behind your object. And make sure this layer is above the object you’d like to eventually move behind. This lets you be able to do the next step easily.
- Manually mask the overlapping areas where you’d like to move your image behind. See above for examples since visuals describe this better.
- Select the foreground layer (i.e. the object/image to be in front) and then duplicate the mask(s). This’ll then create an extra layer that you can use to hide your background image behind. Again, hard to describe in words here so refer to visuals above.
So technically speaking, you don’t move an image behind another in Photoshop in this technique. You simply create extra foreground layers to cover up the layer you’d like to hide. This results in more effective, higher quality, and faster work.
Worried about too many layers? Just merge your layers and you’re good to go.


0 Comments
Trackbacks/Pingbacks